Accessing SFTP on Metworx and Local Machines
Overview
This document covers the basic elements of configuring SFTP access for a Metworx workflow and a local machine.
Table of Contents
- Generate Key to Access SFTP Resource
- Provide SFTP Access Key to Another Computer
- Convert Key to Windows Format - Windows Machines Only
- Access SFTP Resource Using FileZilla
Generate Key to Access SFTP Resource
First, you will need to generate a key that can be assigned to allow access to the SFTP resource.
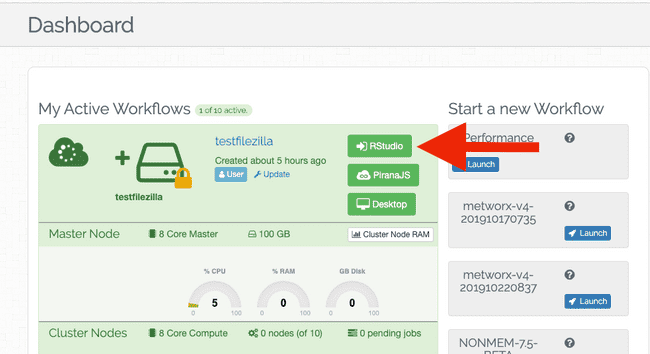
- Launch Rstudio from your Metworx workflow.
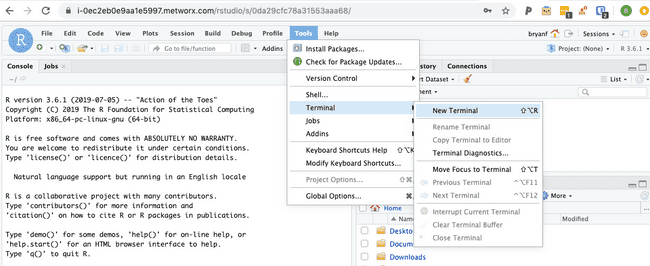
- In RStudio, open a terminal session by selecting Tools > Terminal > New Terminal.
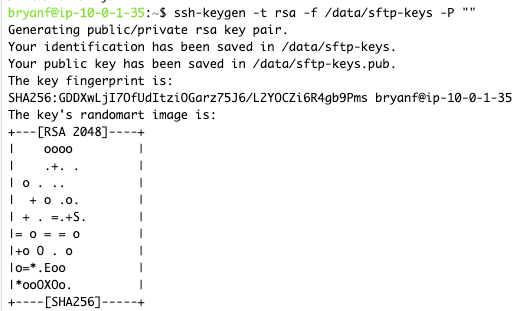
- Generate the ssh key using the command
ssh-keygen -t rsa -f /data/sftp-keys -P "" - You should get a confirmation from the above command that looks similar to the image below
- That confirmation confirms that you have a public and a private key generated in the /data/ directory. The public key is the one ending with .pub (eg /data/sftp-keys.pub); the private key is the one that does not end in .pub.
- If MetrumRG is managing your sftp solution, you will need to provide the public key to MetrumRG so we can ensure a storage bucket is configured to allow you access. Otherwise, provide the public key (ending in .pub) to whoever is managing the sftp resource so that they can configure access based on that key.
- After completing the step above, you can access the SFTP resource by specifying the private key (located at
/data/sftp-keys) you generated, the username/password, and the location/address of the SFTP resource.
Provide SFTP Access Key to Another Computer
This step is only necessary if you have another device that needs to access the SFTP resource as well. In cases like this, the additional computer will need the private key that you generated within the workflow.
Please note: There are myriad ways to accomplish this depending on your constraints and technical proficiencies. To keep things straightforward, we are including an example one of the more straightforward ways to copy this key below.
- Open the File Manager in your workflow’s desktop by clicking the File Manager icon.
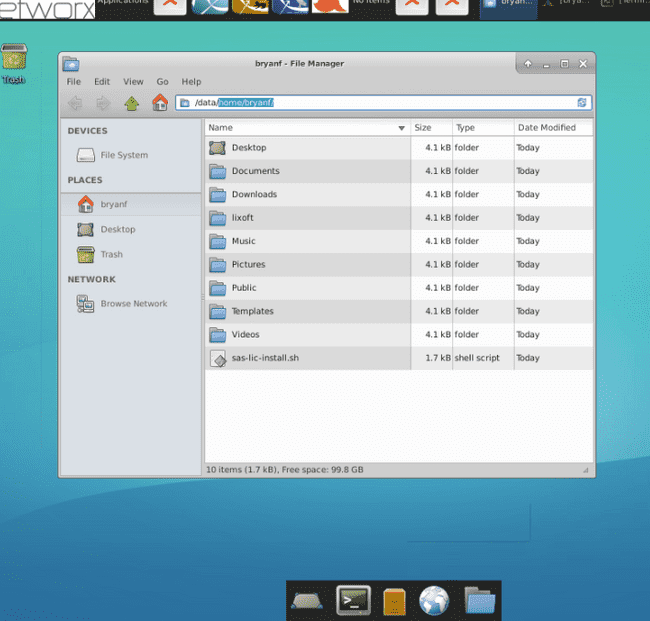
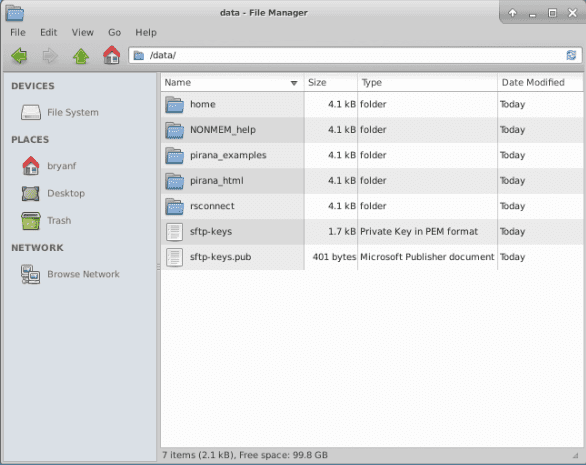
- When you first open File Manager, it will likely default to a location similar to /data/home/
. Update the address in your File Manager to /data. (in the image shown, the highlighted text in the address bar is /home/bryanf).
- After telling File Manager to navigate to /data/ you should see the public and private key you generated (in the image below, the public key is sftp-keys.pub and the private key is sftp-keys).
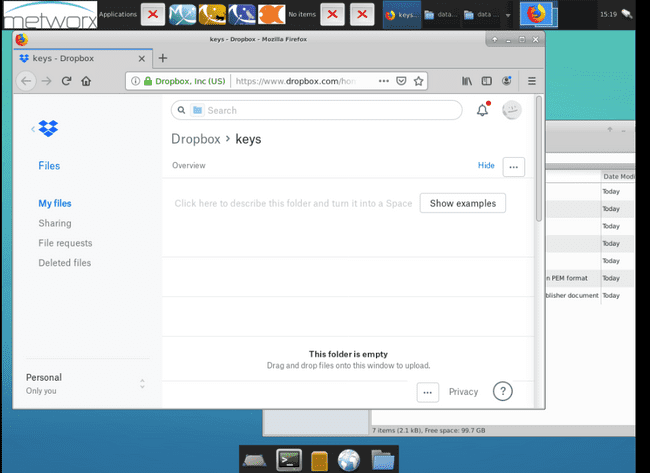
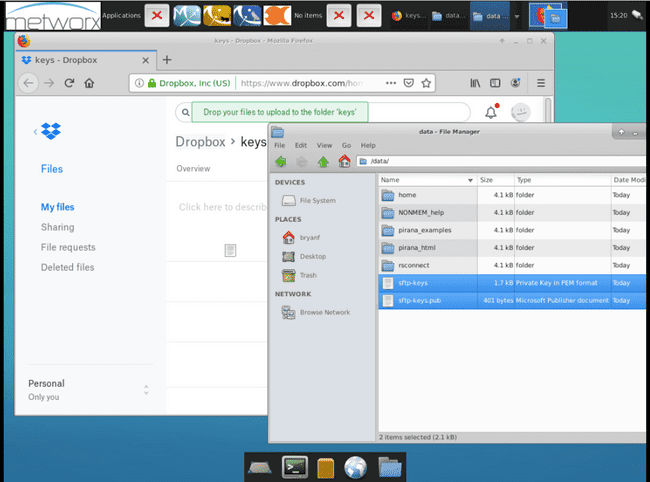
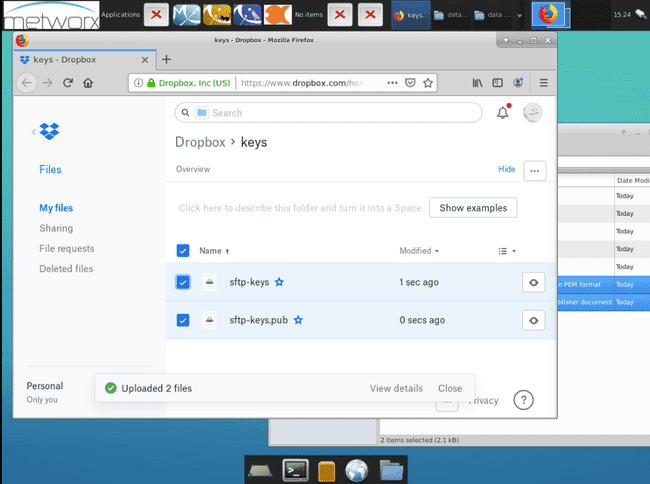
- Open a browser and navigate to an email or file-sharing solution that is acceptable for your use case (e.g. you may be able to accomplish this with email/webmail, or alternatively a file sharing resource such as Dropbox). Sign in and send or store sftp-keys and sftp-keys.pub. The screenshot below demonstrates doing this with Dropbox.
- Important: if you are using a file sharing resource such as Dropbox, ensure you have taken appropriate steps to prevent unintentionally sharing those files (principle of least-privilege). In the example screenshot, a “keys” folder has been created (and is only shared with the user accessing it).
-
Next, navigate to the device that you want to access the SFTP resource from (e.g. your Windows laptop). Open a browser and navigate to the same resource you used in step #4 above (e.g. login to your email or file sharing service). Download both files (sftp-keys and sftp-keys.pub) to your local machine.
-
The private key will allow you to access the SFTP resource from the device you downloaded it onto (or you can share as needed to other devices you will need to access from).
- Do not share your private key.
-
The public key is used to determine/provide access to the SFTP resource (so if we are managing that for you, we will need you to provide us with the public key in order to setup SFTP access to an S3 bucket for you).
- If MetrumRG is managing your sftp solution, you will need to send the public key (which ends with
.pub)
- If MetrumRG is managing your sftp solution, you will need to send the public key (which ends with
-
Convert Key to Windows Format (Windows Machines Only)
If you are adding a key to a Windows-based computer, you will also need to convert the key format (from .pem to .ppk) before you can use it to access the SFTP resource.
- Download PuTTY if you have not done so already.
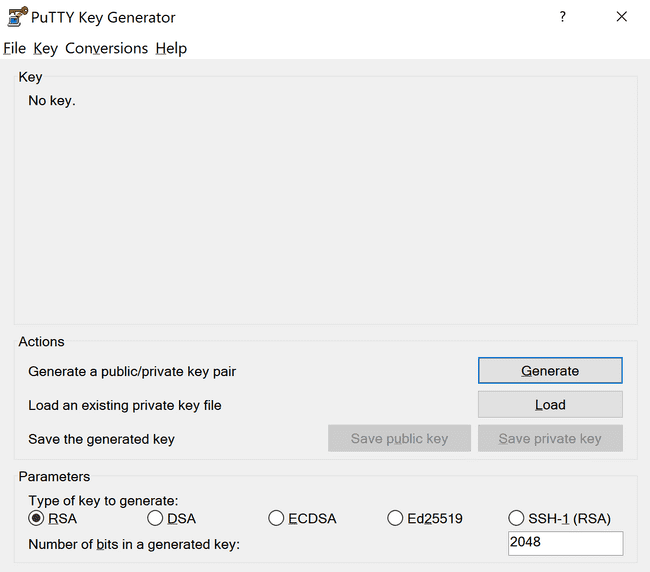
- After installing PuTTY, enter PuTTYgen into the search bar (next to the Windows Start Menu). (Or navigate to PuTTYgen via the Start menu via Start Menu > PuTTY > PuTTYgen).
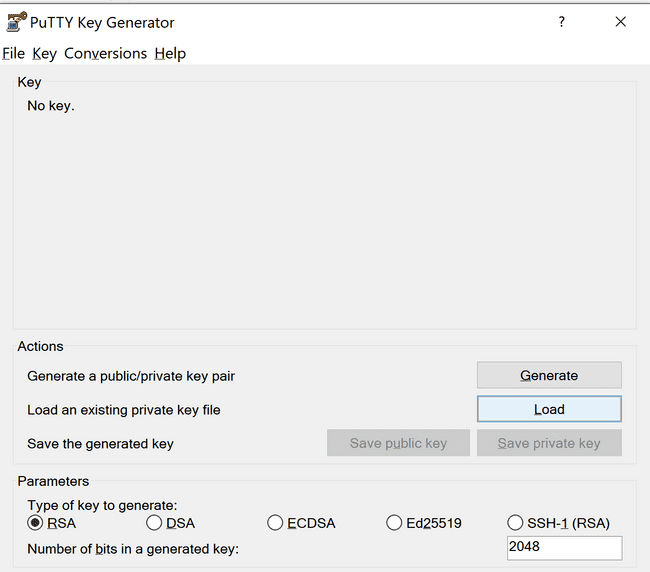
- Select Load to load an existing private key file.
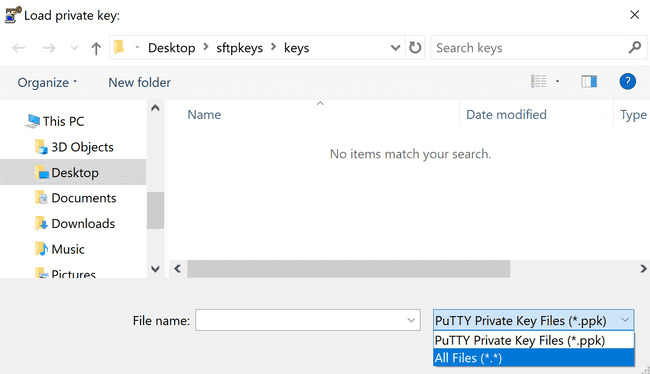
- Click on the drop-down menu selection (which likely defaults to "PuTTY Private Key Files (*.ppk)" ) and select All Files (.)
-
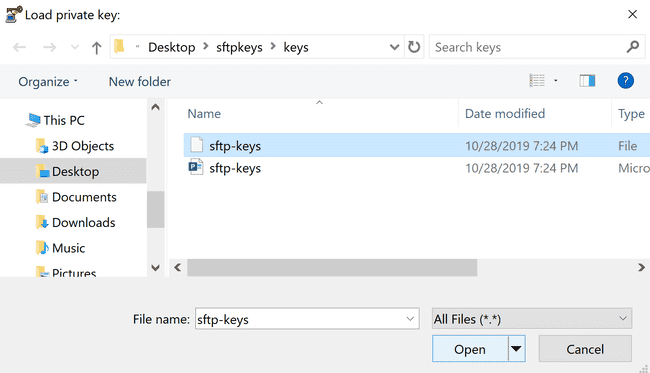
Navigate to the directory where you downloaded the keys and select the private key (it's the one that does not end with
.pub). After selecting the private key, click Open.- Note: Microsoft may indicate that the public key is a "Microsoft Publisher Document," instead of indicating
the suffix
.pub
- Note: Microsoft may indicate that the public key is a "Microsoft Publisher Document," instead of indicating
the suffix
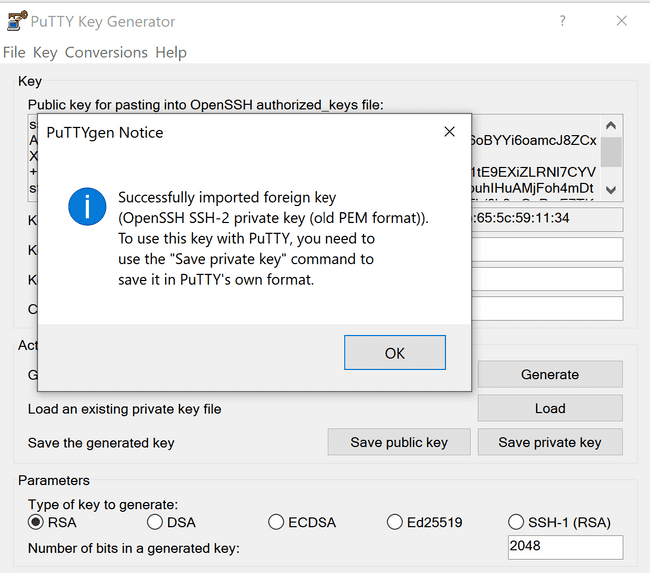
- A dialog box should display a "PuTTYgen Notice" informing you that it successfully imported the key. Click OK.
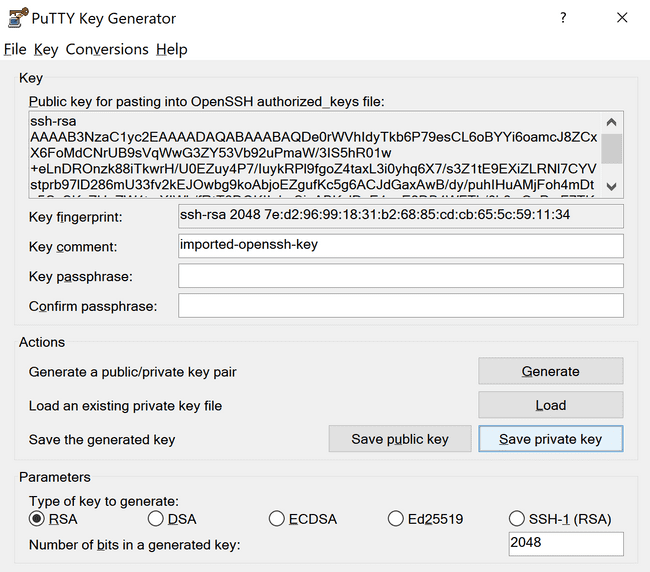
- Select Save private key in the PuTTY Key Generator window. Choose whether or not you want to use a passphrase to protect the key (if you select "Yes" then you will have to enter that passphrase when using the key to access the SFTP resource).
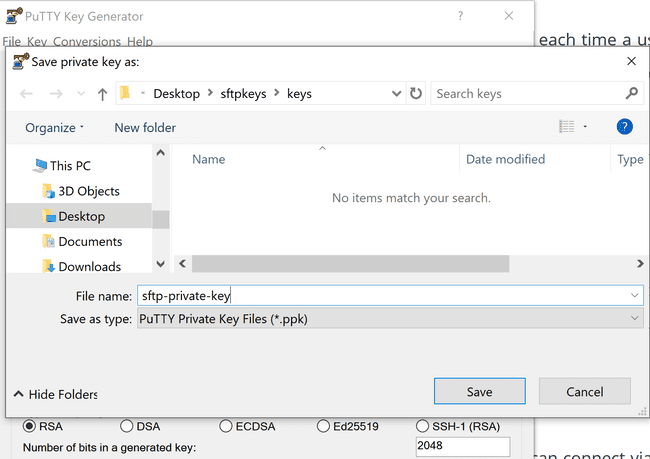
- Specify a name for your converted key (you may also change the directory here if you like), and select Save - this will create a Windows-friendly .ppk key with the name you just specified, in the location you just specified.
Access SFTP Resource Using FileZilla
This summarizes how to use FileZilla to access your SFTP resource. Please note: - If you are using a Windows machiine, make sure you have converted your key to a Windows-friendly format (guidance for this is included above) - If MetrumRG is managing your SFTP resource, then we will need your public key to setup your access (guidance related to this is also included in the sections above) - FileZilla has support resources available as well, so you can refer to the FileZilla wiki for additional context and guidance. - Whoever is managing your SFTP resource will need to ensure you have the information necessary to complete step 3 below - so you should listen to them if they tell you to do something differently than described below (consider step 3 "default" steps for accessing your SFTP resource)
- Open FileZilla.
- Select the Site Manager icon in the top bar of FileZilla.
-
Select New Site in the Site Manager window. Update the following fields:
- Protocol: Select `SFTP - SSH File Transfer Protocol
- Host: Enter the address of the SFTP resource
- Port: Enter 22 as the port (please note that FileZilla generally seems to manage this for you)
- Logon Type: Select
Key file - User: Enter the user name to access the SFTP resource
- Key file: Click the Browse.. button and navigate to the location where you saved your private key, then select your private key and click Open. If you are using a Windows computer, make sure you have converted your key to a Windows-friendly format (guidance is included above in support of this).
- If you have any questions based on the steps above, consult with the person who is managing your SFTP resource. When you have finished making the selections noted above, select Connect to connect to your SFTP resource.
-
Once you have connected to your SFTP resource, you can upload and download files from it.
- The Local site: pane represents the computer you are accessing the SFTP resource from;
- The Remote site: pane represents the SFTP resource that you are accessing from your computer
Uploading in FileZilla To upload a file to your SFTP resource using FileZilla, navigate to the desired file in the Local site pane. You can select where to upload the file by navigating to the desired location in the Remote site pane. When you find the file you want to upload, right-click and select Upload.
Downloading in FileZilla To download a file from your SFTP resource using FileZilla, navigate to the desired file in the Remote site pane. You can select a destination for the file download by navigating to the desired location in the Local site pane. When you find the file you want to download, right-click and select Download.
