Publishing an App
Publishing an app is easy! There are two methods for publishing apps on Rstudio Connect:
- Using the Publish Button, which will infer certain settings and upload all files in the app directory
- A controlled method that involves specifying the exact files you want to upload, along with setting other preferences like the user and server url.
Using the Publish Button
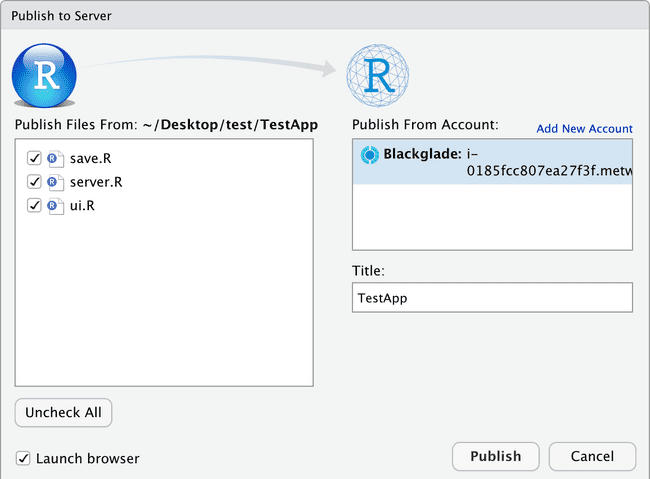
Once you open a valid Shiny App project in RStudio, navigate to one of the following R Scripts that are part of the app: ui.R, server.R, app.R, global.R. A Publish Button should appear on the top right of the code window. It's a blue circular icon next to Run App button.
Clicking on it will reveal the available accounts connected and then you can simply select the files you wish to upload along with the app and click Publish!
Using the Publish Button is simpler and typically fine for apps that only have a single developer and do not require frequent updates.
Using the Controlled Method: Deploy Script
We often recommend using the controlled method for publishing apps, as it makes collaboration easier and allows the user to set preferences that might be needed to guarantee a successful app deployment. This is done by creating a deploy.R script in your app directory. A deploy.R script contains build instructions for what to publish (appFiles or appDir), where to publish (server and appId), and how to publish (lint, forceUpdate, pythong, etc.). This method is required if your app embeds Rmarkdown reports within the app, requires python environments, or involves deployment from multiple collaborators.
An example can be seen below:
rm(list=ls())

dev = TRUE

names <- if(dev==TRUE){
  c("test_app_dev","Test_app_v4_dev")
}else{
  c("test_app_prod","Test_app_v4")
}

rsconnect::deployApp(
  forceUpdate = TRUE,
  appName = names[1],
  appTitle = names[2],
  appDir = ".",
  server = "shiny-apps.metworx.com",
  appId = 30, # 36 for PROD
  appFiles = c(
    "app.R",
    "globals.R",
    "input.Rmd",
    list.files("data", full.names = TRUE, recursive=FALSE),
    list.files("model", full.names = TRUE, recursive=TRUE),
    list.files("www", full.names = TRUE, recursive=TRUE),
    list.files("functions", full.names = TRUE, recursive=TRUE),
    list.files("modules", full.names = TRUE, recursive=TRUE)
  ),
  lint = FALSE
)
Production vs. Development
In this example we have a procedure for deploying to both a production environment (PROD) and a development environment (DEV). You can imagine a situation where the development version is only accessible by an internal development team, and the production version is also exposed to a client or larger team. To change which app we are updating, we only have to set dev = FALSE and appId = 36 to deploy to PROD. Note that setting the appId is optional, and is only necessary when multiple developers are updating the same app instance. See the Transferring Apps across machines section in this document for more details.
File Inclusion
Your app directory likely includes other setup scripts, package installation instructions, or other file types that aren't necessary for the app to run. Including only the necessary files will speed up the initial deployment and future updating. It is worth noting that developers don't need to be worried about accidentally deploying any confidential data, as users will not be able to see any deployed file or its contents.
Linting
By default lint is set to TRUE, which will tell RSConnect to lint the project before initiating deployment to identify any potentially problematic code. Generally this is a good thing, however in the above example we wanted to deploy both an app.R and an input.Rmd, where the latter was used to generate reports. Trying to deploy both of these files without lint = FALSE will cause the deployment to fail, as RSConnect thinks you're trying to deploy both the Rmarkdown document and app.R. Hence, if your app requires an embedded Rmarkdown document, or you're running into issues during the deployment in general, this is a good option to check.
Using the controlled method is the recommended option if you have multiple app developers, require better version control, or frequently update the app.
Notes on Publishing
Active Development
-
For active shiny development and deployment, it is much more important for the code to be reproducible and version controlled.
- Shiny related packages update often. You’ll want to lock down package versions, function updates, etc. so that nothing unexpected happens during deployment
MPN,pkgr, andrenvare highly recommended for shiny app development, especially when involving collaborators, as that will ensure you are all using the same package versions
.Rprofile
-
When you deploy an application, RSConnect needs to know where to look to find the required packages. This is done through options:
options(repos = c(MPN = “”, CRAN = “”))- We usually do this in the
.Rprofileto avoid having to set these before each deployment. - If you have been using
pkgrfor app development, these should match what you have underRepos:in yourpkgr.ymlfile.
- CRAN must be set, or RStudio will automatically add it. If you're not installing any packages from CRAN, you should set
CRANto the same URL as MPN (as shown below). -
If you depend on a Shiny package only available on CRAN, be sure to always install the latest version before deploying
- RSConnect will always fetch the latest version (not necessarily the version you have installed)
Example .Rprofile:
options(repos = c(
  MPN = "https://mpn.metworx.com/snapshots/stable/2022-06-15",
  CRAN = "https://mpn.metworx.com/snapshots/stable/2022-06-15"
  )
)

# Run renv/activate.R
source("renv/activate.R")

if(interactive()){
  message("repos set to: \n\t", paste0(unique(getOption('repos')), collapse = "\n\t"))
  message("library paths set to: \n\t", paste0(.libPaths(), collapse = "\n\t"))
}
What to expect when deployment finishes:
It will bundle your app and transfer it to the RStudio Connect instance on your workflow.
Note: This might take a while depending on your app size
You should see something like this printed out in the Deploy console when it's successfully done:
Application successfully deployed to https://i-abc123def456ghi7.metworx.com:443/rsconnect/content/1/
Deployment completed: https://i-abc123def456ghi7.metworx.com:443/rsconnect/connect/#/apps/1
No Available Publishing Accounts
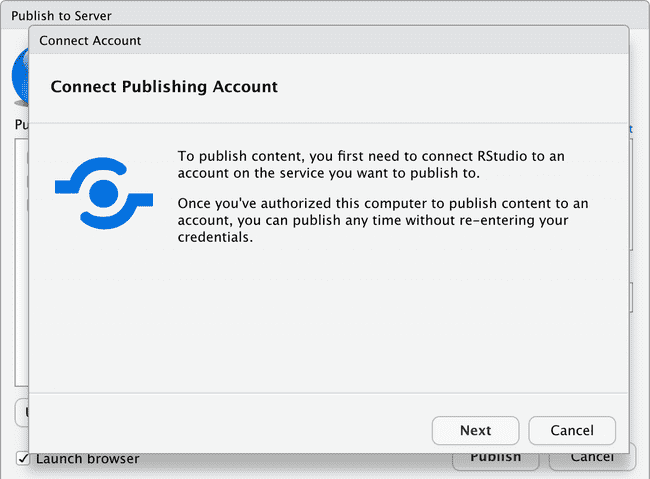
You may be prompted by this window if you have no available publishing accounts:
If this happens, click Next and follow the instructions outlined in the previous step
Updating Published Apps
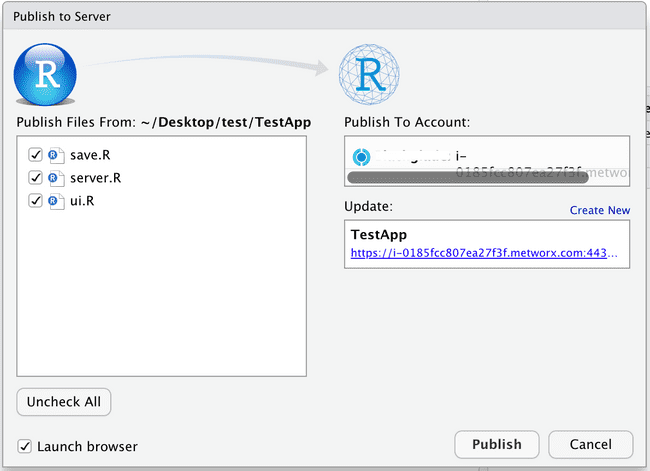
Updating published apps is easy! Simply click on the Publish Button again after making changes to your app and an Update Tab should appear. Just click Publish again and your app should update.
For more publishing scenarios, check out this doc.


