Launching Workflows
Scope
Below are step by step instructions for launching a Metworx workflow.
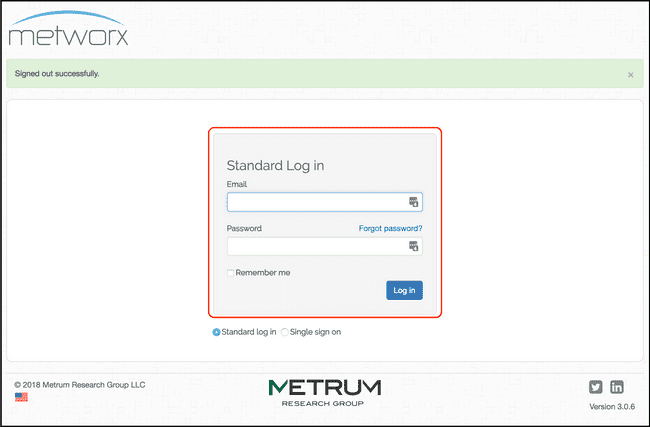
- To launch a Metworx workflow, first log in to the Metworx Dashboard.
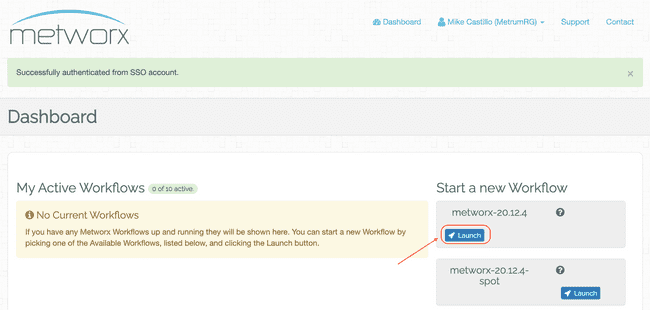
- The Start a new Workflow section (on the right-hand side) shows all available Metworx blueprints. Browse the available blueprints and Launch the version you need, generally this is the most recent blueprint (blueprints are named
metworx-<two digit year>.<month>).
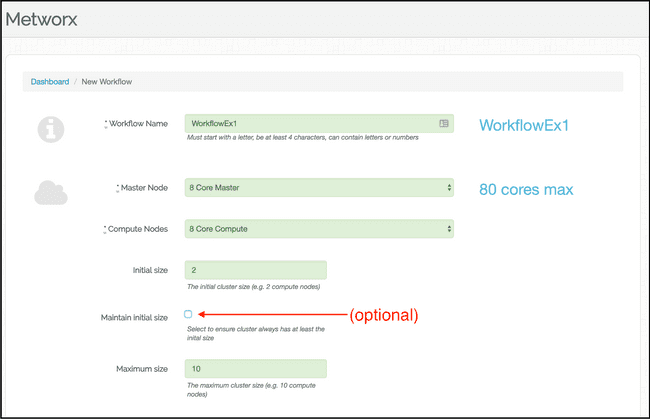
- Fill in the form fields with the necessary settings for your workflow. You can set minimum and maximum cluster sizes, and/or check the box to maintain the initial cluster size. We recommend not checking Maintain Initial Size unless you absolutely need it. This is an advanced option, and while it can be helpful, it is not necessary for most models and simulations to run efficiently. This option prevents Metworx from scaling down compute nodes when they're not in use which can result in unnecessarily large AWS bills.
Fields turn green when valid settings are entered or red if settings are invalid.
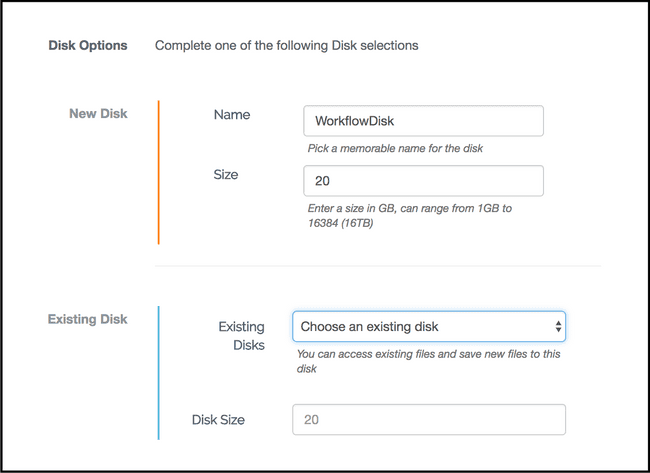
- You may choose to create a new disk for the workflow, or you can start a workflow that uses an existing disk. If creating a new disk, provide a name for the disk and a size in GB. If you are using an existing disk, the Name and Size fields for the New Disk option must be blank. Your existing disks are available from the dropdown menu.
- If necessary, enter Tags such as [{"Key": "MyKey", "Value": "MyValue"}].
- The Access from field is filled out automatically with your computer's current IP address. After launching your workflow, if you need to access it from another location, you need to update this field to a new IP address. If you encounter issues due to an IPv6 address, you can convert the IPv6 address to an IPv4 address.
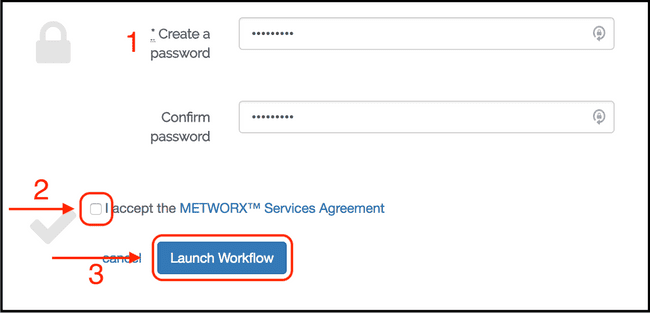
- Create and confirm a password for the workflow, then click the checkbox that indicates you accept the Metworx Services Agreement. Finally, click Launch Workflow.
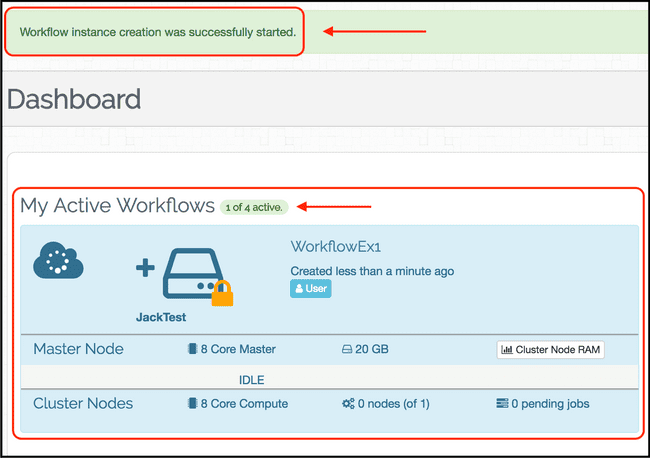
- You will be returned to the Metworx Dashboard, where there is a message confirming the workflow instance was successfully started. While the workflow is starting, the active workflow has a blue background. Multiple workflows may be run concurrently.
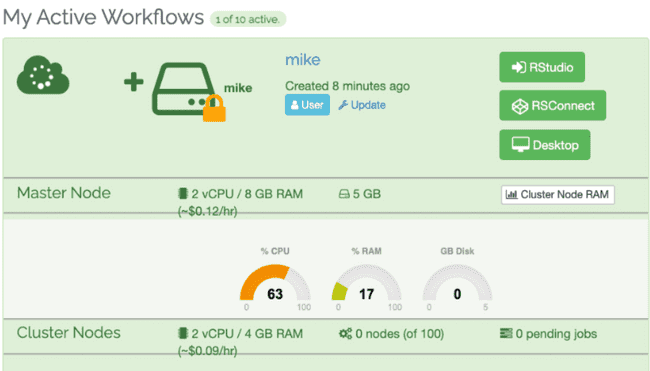
- When the workflow has launched, the active workflow has a green background and you can access the scientific software.
