GIT Branching Workflows"
This article's purpose is to help explain the basics of using GIT / Github Enterprise which can be useful while working within the Metworx platform.
The general steps to maintaining a peer-reviewed artifacts, such as code or reports, on github are as follows.
- A user creates a branch (off main or master branch) for their work in the project's git repo on Github/GHE
- The user adds artifacts, and commits updates to the repo. (via Rstudio, git cli or Github/GHE webapp)
- The user than creates a pull request (PR) for their changes(via Github/GHE).
- The reviewer reviews the PR, where he can comment or request changes, etc(via Github/GHE).
- Once satisfies, the reviewer than approves the PR(via Github/GHE)..
- The user merges the PR into the main branch(via Github/GHE).
The rest of the documents provide more details to these steps.
Using GitHub Enterprise GUI
Creating Repository
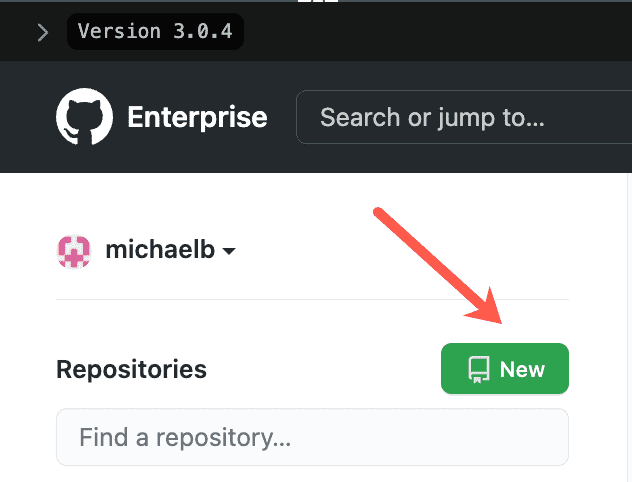
After you login to your GHE account, you will see Repositories on the left-hand side.
Click the green button that says New:
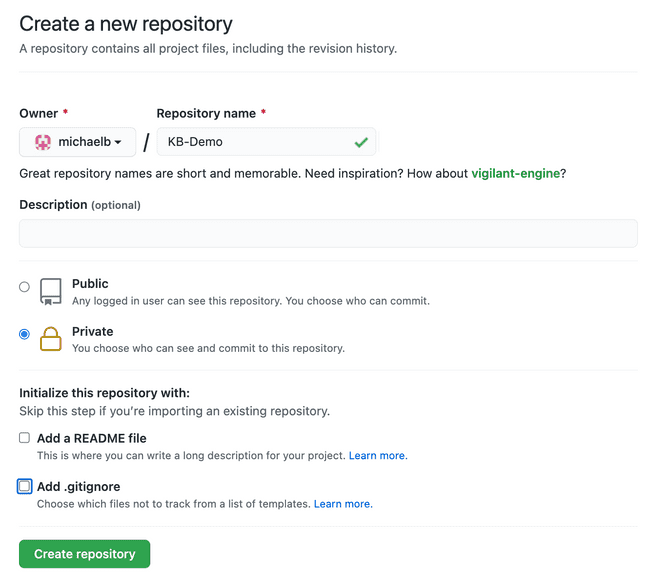
You will then be prompted to create a new repository:
First, give your a repository a name.
Next, select whether you want the repo to be public or private.
Then, choose how you would to initialize your repo. You can add a README file to include a description for your project. You can also add .gitignore to choose which files not to track from a list of templates.
Once ready, click the green Create repository button.
This will result in a successful creation of your new repository.
Adding Collaborators
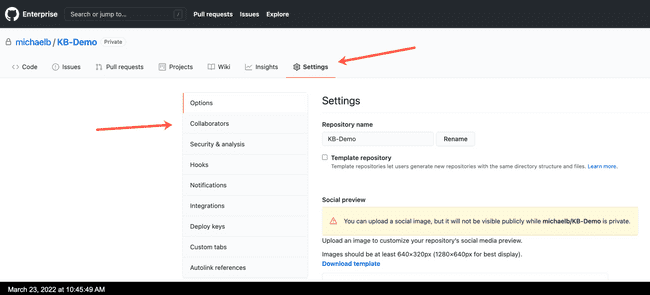
To add collaborators, or people who can contribute to your repo, click the Settings icon and then click Collaborators on the left-hand side:
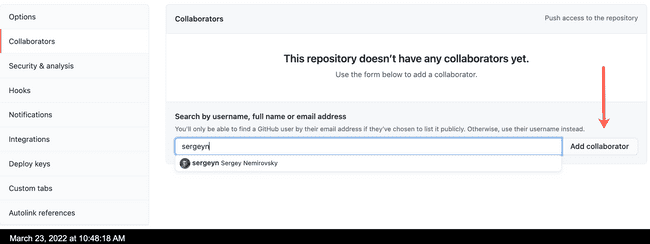
Then, simply begin typing in the name of the person you'd like to add as a collaborator, and their full name should auto-populate. Select that person and then click the Add collaborator button:
This will successfully add that person as a collaborator to your newly created repo:
Project Workflow
Create a new branch
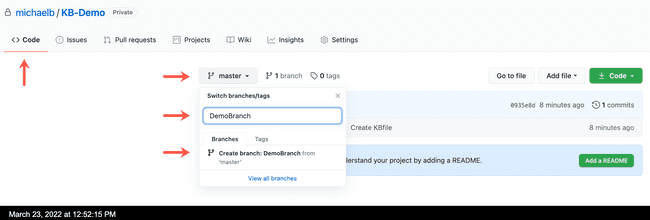
To create a new branch, click on the Code tab and then click the dropdown tab that says master or main.
Then, give your new branch a name and click Create branch: YourBranchName from master to successfully create your new branch:
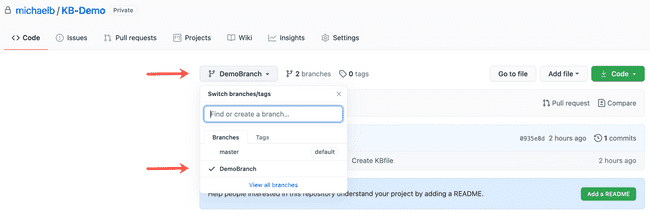
Now, your new branch will be selectable and you can perform work within it:
Create a new branch via Command Line Interface (CLI)
git branch 'Demo Branch Name'
Creating a commit
Here is a helpful link describing conventional commits: https://www.conventionalcommits.org/en/v1.0.0/
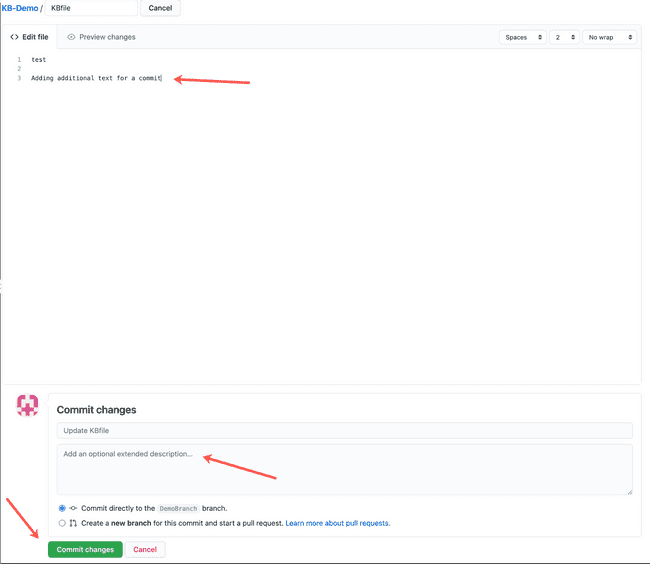
To commit any changes or updates you've made to your file/code, first select the pen icon to edit your file:
Then, make your changes to your file. An additional line of text was added in this example:
There is an option to add an optional extended description to describe what is being changed in this particular commit.
Then, chose whether you'd like to commit directly to the branch you're currently working on or create a new branch for your commit and start a pull request.
Once satisifed, click the green Commit changes button to push your commit.
Creating a commit via the Command Line Interface (CLI)
git commit -m Example Commit
Creating a commit via RStudio
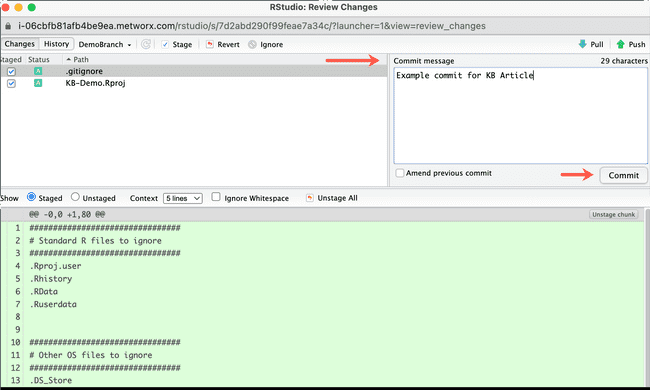
Select the files in which you edited and want to commit the changes for. Then, click the Commit button. You will then see a new window pop up entitled RStudio: Review Changes:
From here, you can review the staged files that are being added/committed. Also, you can add a commit message. Then, click the Commit button.
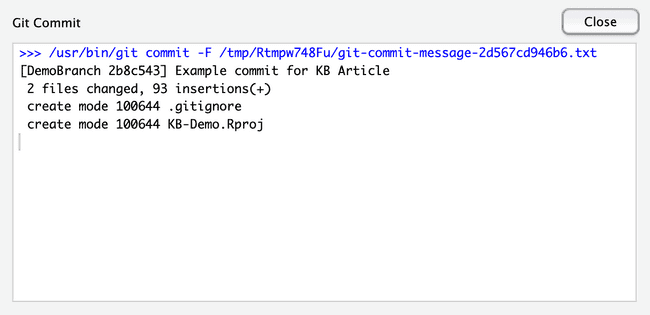
You will then see the commit go through successfully:
Opening a Pull Request (PR)
After you've committed your change, the page will refresh and you will see a similar prompt:
The prompt states that your branch had a recent push (commit) to it and a button to Compare & pull request. Click the green Compare & pull request button.
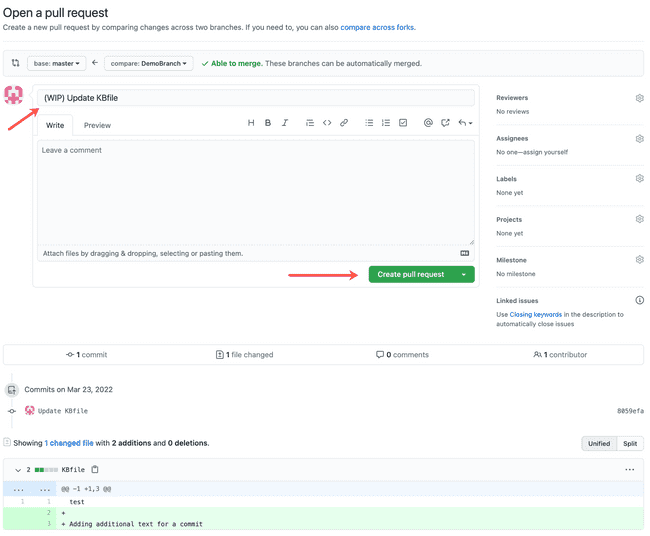
You will then be directed to a page where you can Open a pull request:
It is best to add (WIP) - Work in progress to the title of your pull request as it is being worked on. You should remove the (WIP) from the title once your PR is ready for review.
You can write a comment that describes the PR you are creating.
Once ready, click the green Create pull request button.
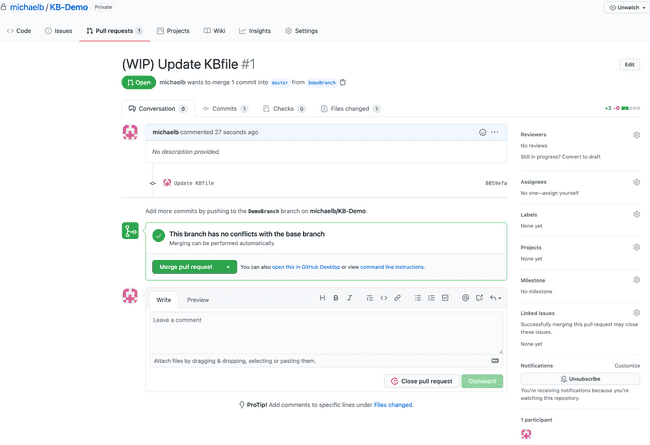
This will result in the successful creation of a new, open pull request:
Reviewing a Pull Request
It is best practice to assign a reviewer(s) to look over your pull request before merging.
A reviewer can review your pull request, make comments to it and request changes.
To add a reviewer, click Reviewers on the right-hand panel:
In the search bar, type a name of a person to review and it will auto-complete. Select that person's name and click anywhere outside of the search bar to finalize it:
The person will then be offically a reviewer and the pull request cannot be merged until they review and approve it.
Once satisfied, the reviewer will then approve the pull request.
Merging a Pull Request
To merge a pull request into your master branch, click the green Merge pull request button:
You'll then be prompted to give your merge a title and description. Once ready, click the green Confirm merge button:
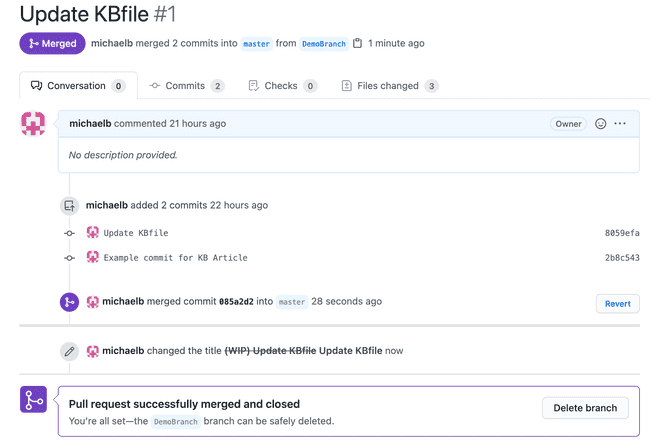
Once complete, you'll see your pull request has been successfully merged into the master branch.
Your branch can then be safely deleted:
Using Command Line Interface (CLI)
Cloning a repository:
SSH
git clone git@ghe.metrumrg.com:michaelb/KB-Demo.git
HTTPS
git clone https://ghe.metrumrg.com/michaelb/KB-Demo.git
Create branch:
git branch 'Demo Branch Name'
Switch to editing branch:
git checkout Demo Branch Name
View which branch you're connected to:
git branch
Add file that was changed / updated:
git add example.file
Push commits:
git push
Merge branch:
git merge Demo Branch Name
Using Git in RStudio
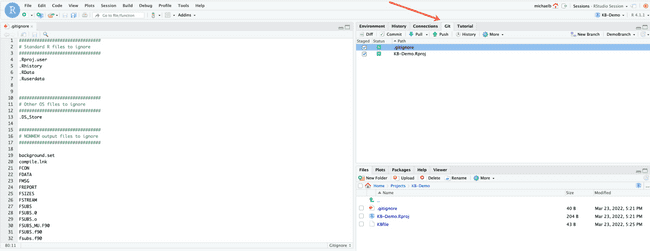
Within in RStudio Session, there is a Git tab that can be utilized:
Creating or selecting a branch
Click New Branch to create a new branch
OR
Select the dropdown option to chose between your local branches
Pushing a commit
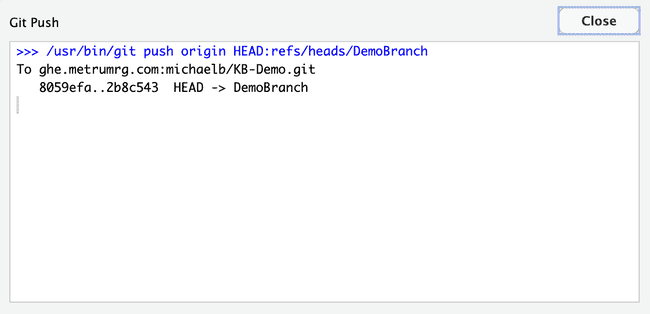
Simply click the Push icon to push your commit:
You will then see a new window pop up that shows your push go through successfully:
