Working with Disks
Scope
Metworx disks are where your data is stored while you work on your Metworx workflow(s).
Creating a New Disk
The first time you launch a Metworx workflow, you'll need to create a new disk and you can create new disks at any time as needed.
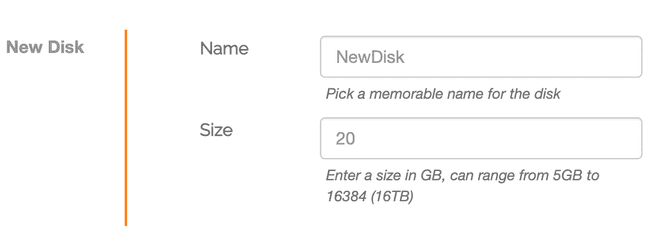
Each disk must be given a name and an appropriate storage size. Best practice is to select a disk size relative to the amount of data you expect to use in the analysis. You can resize your disk to increase the storage capacity, if necessary, but you cannot reduce the size of a disk.
Use an Existing Disks
When you delete a Metworx workflow, your work is saved to the disk you created when the workflow was launched. To resume working on that disk, you launch a new workflow and select the existing disk from a dropdown menu.
The disk size can be updated or maintained as needed.
Resize an Existing Disk
If you find you're running out of space on an existing disk, you can resize it by:
- Deleting any current workflow connected to that disk.
- Creating a new workflow: 2.1 Select the appropriate disk from the Existing Disks dropdown menu. 2.2 Update the size in Disk Size. 2.3 Launch the workflow.
You cannot reduce the size of an existing disk.
Monitor Disk Space
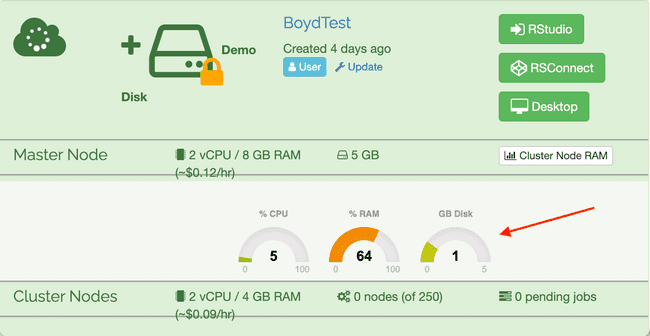
The Metworx dashboard depicts the amount of disk space in use.
Remaining disk space can be determined from the terminal by running the following command:
df -h /dataYour output will look similar to this:
$ df -h /data

Filesystem      Size  Used Avail Use% Mounted on

/dev/nvme1n1    4.8G  459M  4.1G  10% /data
We strongly recommend keeping your disk space use under 75% at all times.


